Raya I BA E - B&K Lumitec
10
User manual s D E L W C W 0 1 0 0 1 z H 0 6 / 0 5 , C A V 0 4 2 - V W 5 3 . x a M 0 -40 - ℃ ℃ IP 20 LED QFlower
Transcript of Raya I BA E - B&K Lumitec

User manual
sDEL WC W01
001 zH06/05 ,CA V042 - VW53
.xaM
0 -40
-
℃ ℃
IP 20dam e in CRP
4.0Kg
LED QFlower
2 / 10
Table of contents
1. Safety instructions ............................................................................................................................ 3
1.1. FOR SAFE AND EFFICIENT OPERATION ............................................................................ 3
2. Technical Information ....................................................................................................................... 4
3. DMX Mode ....................................................................................................................................... 4
3.1. ....................................................................................... 4
4. Control of the Menu .......................................................................................................................... 6
4.1. Menu structure ......................................................................................................................... 6
4.2. Description of the Menu ........................................................................................................... 7
5. Master Slave configuration ............................................................................................................... 8
6. Sound to Light .................................................................................................................................. 8
7. Technical Data ................................................................................................................................. 9
7.1. Power daisy chain ................................................................................................................... 9
3.2. DMX chart 3 CH mode...................................................................................................................... 5
DMX chart 1 CH mode......................
3 / 10
1. Safety instructions
• This device is suitable for indoor use only.
• All modifications to the device will void the warranty.
• Repairs are to carry out by skilled personnel only.
• Use only fuses of the same type and original parts as spare parts.
• Protect the unit from rain and humidity to avoid fire and electric shocks.
• Make sure to unplug the power supply before opening the housing.
1.1. FOR SAFE AND EFFICIENT OPERATION
Be careful with heat and extreme temperature
Avoid exposing it to direct rays of the sun or near a heating appliance.
Not put it in a temperature bellow 32°F /0°C, or ex ceeding 104°F /40°C.
Keep away from humidity, water and dust
Do not place the set in a location with high humidity or lots of dust.
Containers with water should not be placed on the set.
Keep away from sources of hum and noise
Such as transformer motor, tuner, TV set and amplifier.
To avoid placing on un-stable location
Select a level and stable location to avoid vibration.
Do not use chemicals or volatile liquids for cleani ng
Use a clean dry cloth to wipe off the dust, or a wet soft cloth for stubborn dirt.
If out of work, contact sales agency immediately
Any troubles arose, remove the power plug soon, and contact with an engineer for repairing,
do not open the cabinet by yourself, it might result a danger of electric shock.
Take care with the power cable
Never pull the power cable to remove the plug from the receptacle, be sure
to hold the plug. When not using the device for an extended period of time, be sure to
disconnect the plug from the receptacle.
4 / 10
Important: Damages caused by the disregard of this user manual are not subject to warranty. The dealer will not accept liability for any resulting defects or
problems. Make sure the electrical connection is carried out by qualified
personnel. All electrical and mechanical connections have to be carried out
according to the European safety standards.
2. Technical Information - 10W RGBW LED
- Sound to light mode via internal mic
- 6 internal programs
- Digital display for addressing and functions
- Power and DMX can be daisy chained
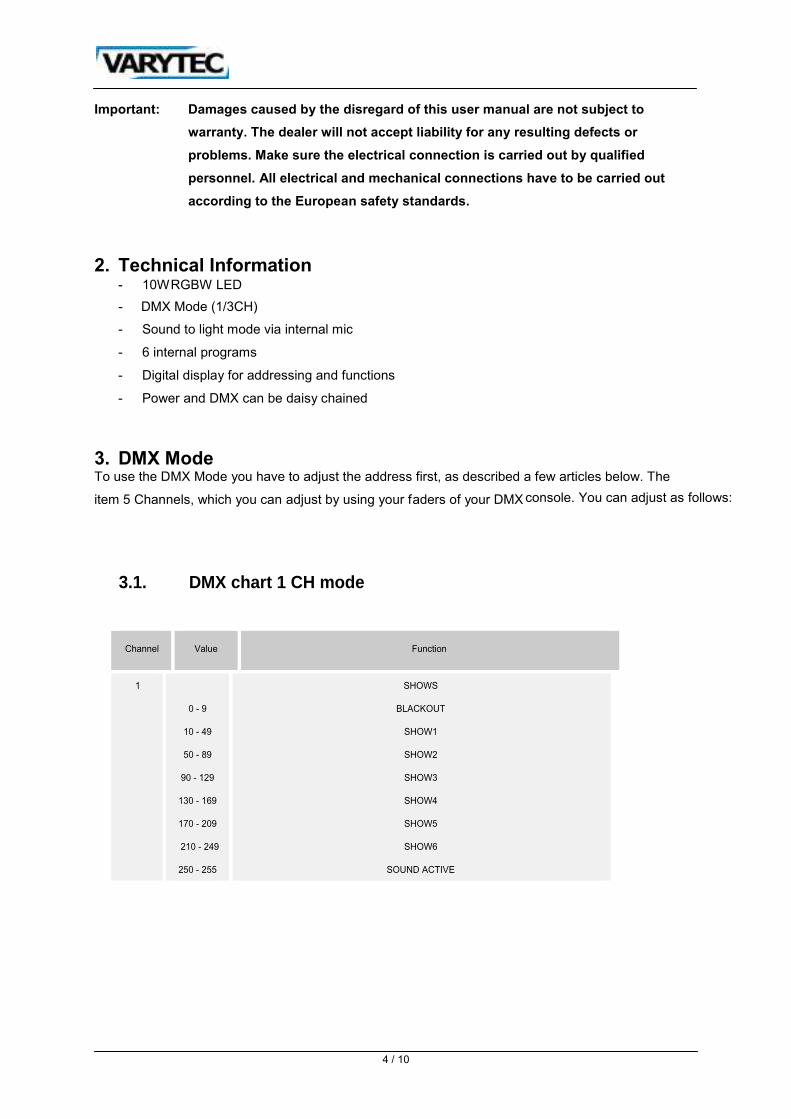
3. DMX Mode To use the DMX Mode you have to adjust the address first, as described a few articles below. The
item 5 Channels, which you can adjust by using your faders of your DMX console. You can adjust as follows:
- DMX Mode (1/3CH)
3.1. DMX chart 1 CH mode
Channel Value Function
1
0 - 9
10 - 49
50 - 89
90 - 129
130 - 169
170 - 209
210 - 249
250 - 255
SHOWS
BLACKOUT
SHOW1
SHOW2
SHOW3
SHOW4
SHOW5
SHOW6
SOUND ACTIVE

5 / 10
The connectors configuration is as follows:
If you want to produce a DMX terminator on your own, you have to insert a Terminator at the plug.
This should have a size of 120Ohms and 1/4W. It has to be inserted between Pin 2 (Data -) and Pin 3
(Data +).
If you use cables longer then 100m you should put in a terminator at the last item in your daisy chain!
Use DMX cables with a 120Ohms shield only! All Plugs should use XLR connectors!
3.2. DMX chart 3 CH mode Channel Value Function
1 0 - 7
8 - 199 200 - 247
248 - 255
DIMMER/STROBE NO FUNCTION
DIMMER 0% - 100% OPEN
2 0 - 7
8 - 24 25 - 41 42 - 57 58 - 74 75 - 91
92 - 107 108 - 124 125 - 141 142 - 157 158 - 174 175 - 191 192 - 207 208 - 224 225 - 240 241 - 255
COLORS BLACKOUT
RED GREEN BLUE
WHITE RED&GREEN RED&BLUE
RED&WHITE GREEN&BLUE
GREEN&WHITE BLUE&WHITE
RED,GREEN,&BLUE RED,GREEN,&WHITE RED,BLUE,&WHITE
GREEN,BLUE,&WHITE RED,GREEN,BLUE,&WHITE
3 0 - 9
10 - 120 121 - 134 135 - 245 246 - 255
GOBO ROTATION STOP
ROTATION FAST - SLOW STOP
ROTATION SLOW - FAST STOP
6 / 10
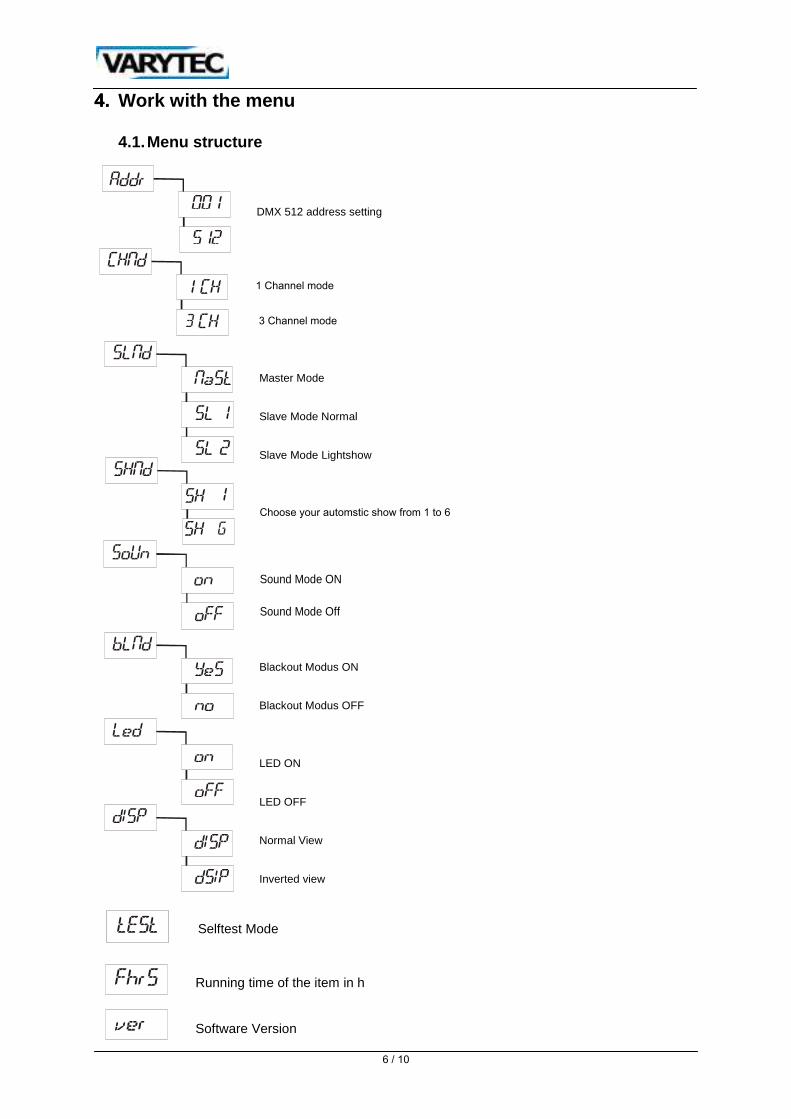
4. Control of the Menu
4.1. Menu structure
DMX 512 address setting
ose your automatic show from 1 to 12
DMX 512 address setting
Master Mode
Slave Mode Normal
Slave Mode Lightshow
Blackout Modus ON
Blackout Modus OFF
LED ON
LED OFF
Normal View
Inverted view
Running time of the item in h
Software Version
Addr
001
512
SLNd
NaSt
SL 1
5L 2
SHNd
1
6
bLNd
YeS
no
Led
on
oFF
dISP
dISP
dSIP
FhrS
ver
4.1. Menu structure
4. Work with the menu
Sound Mode ON
Sound Mode Off
SoUn
on
oFF
SH
SH
Selftest Mode tESt
G
Choose your automstic show from 1 to 6
CHNd
1 CH
CH3
1 Channel mode
3 Channel mode
7 / 10
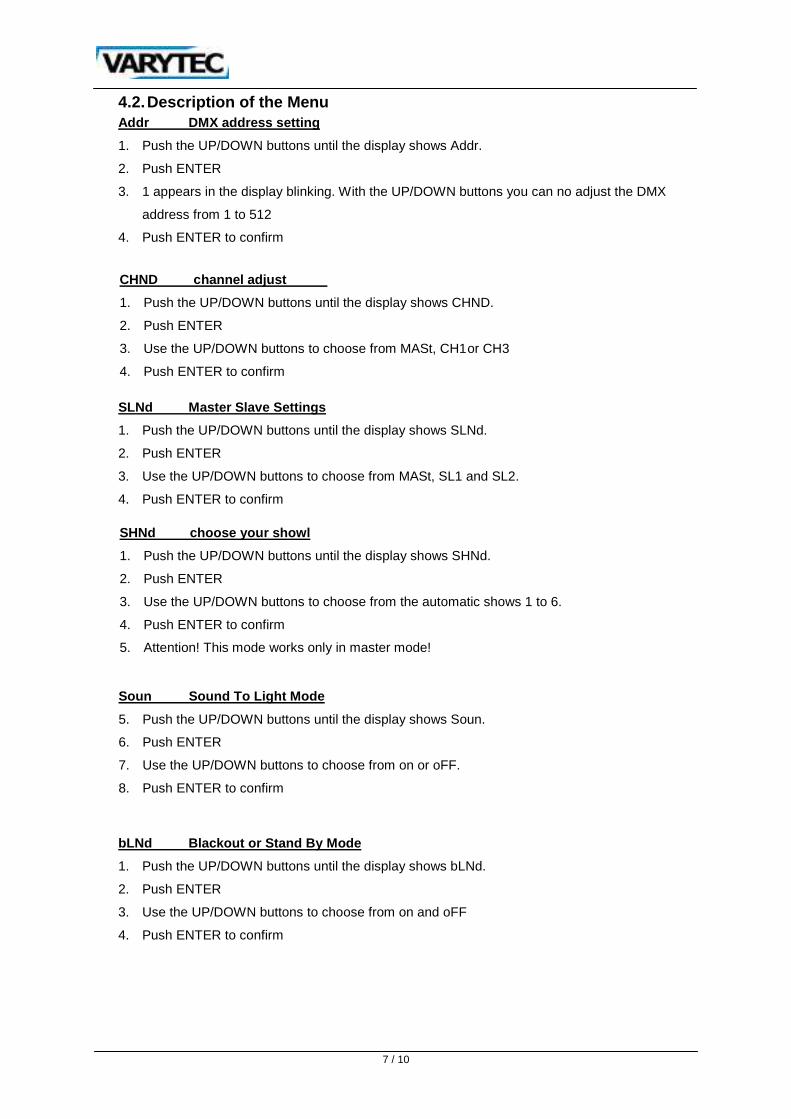
4.2. Description of the Menu Addr DMX address setting
1. Push the UP/DOWN buttons until the display shows Addr.
2. Push ENTER
3. 1 appears in the display blinking. With the UP/DOWN buttons you can no adjust the DMX
address from 1 to 512
4. Push ENTER to confirm
SLNd Master Slave Settings
1. Push the UP/DOWN buttons until the display shows SLNd.
2. Push ENTER
3. Use the UP/DOWN buttons to choose from MASt, SL1 and SL2.
4. Push ENTER to confirm
SHNd choose your showl
1. Push the UP/DOWN buttons until the display shows SHNd.
2. Push ENTER
3. Use the UP/DOWN buttons to choose from the automatic shows 1 to 6.
4. Push ENTER to confirm
5. Attention! This mode works only in master mode!
bLNd Blackout or Stand By Mode
1. Push the UP/DOWN buttons until the display shows bLNd.
2. Push ENTER
3. Use the UP/DOWN buttons to choose from on and oFF
4. Push ENTER to confirm
Soun Sound To Light Mode
5. Push the UP/DOWN buttons until the display shows Soun.
6. Push ENTER
7. Use the UP/DOWN buttons to choose from on or oFF.
8. Push ENTER to confirm
CHND channel adjust
1. Push the UP/DOWN buttons until the display shows CHND.
2. Push ENTER
3. Use the UP/DOWN buttons to choose from MASt, CH1 or CH3
4. Push ENTER to confirm

8 / 10
dISP inversion of the Display
1. Push the UP/DOWN buttons until the display shows dISP.
2. Push ENTER
3. Use the UP/DOWN buttons to choose from dISP and dSIP, in this case dSIP means the
display is inverted and turned 180°
4. Push ENTER to confirm
FhrS Zeigt die Laufzeit des Gerätes an
1. Push the UP/DOWN buttons until the display shows SLNd.
2. Push ENTER
3. Now the display shows the running time of the item.
Ver Software Version auslesen
1. Push the UP/DOWN buttons until the display shows SLNd.
2. Push ENTER
3. Now the display shows the actual software version.
5. Master Slave configuration If you want to daisy chain and control more than one item you can use the Master Slave Mode. To do
so you have to daisy chain your items as you would do when you want to set up a dmx chain. You can
use max 16 items for this mode. The first item in line is the master and the other items will react
according to him. The master item can be set up to the desired program or mode and the others will
follow. The slave items should be set up as follows.
1. Push the Menu button as often until you see SLNd in the display. Push Enter to confirm.
2. No choose the desired Slave mode and confirm again with ENTER.
3. The slave item will now react according to the master.
6. Sound to Light - Set up the sound to light mode to ON as described above.
- Now the item will react according to the sensitivity you set up at the mic.
- This option can be used with the master slave mode as well.
1. Push the UP/DOWN buttons until the display shows
2. Push ENTER
Tgst Test Led
Tgst
3. Now the display shows the running test of the item
Led LEDs On and OFF
1. Push the UP/DOWN buttons until the display shows Led.
2. Push ENTER
3. Use the UP/DOWN buttons to choose from on and oFF
4. Push ENTER to confirm
9 / 10
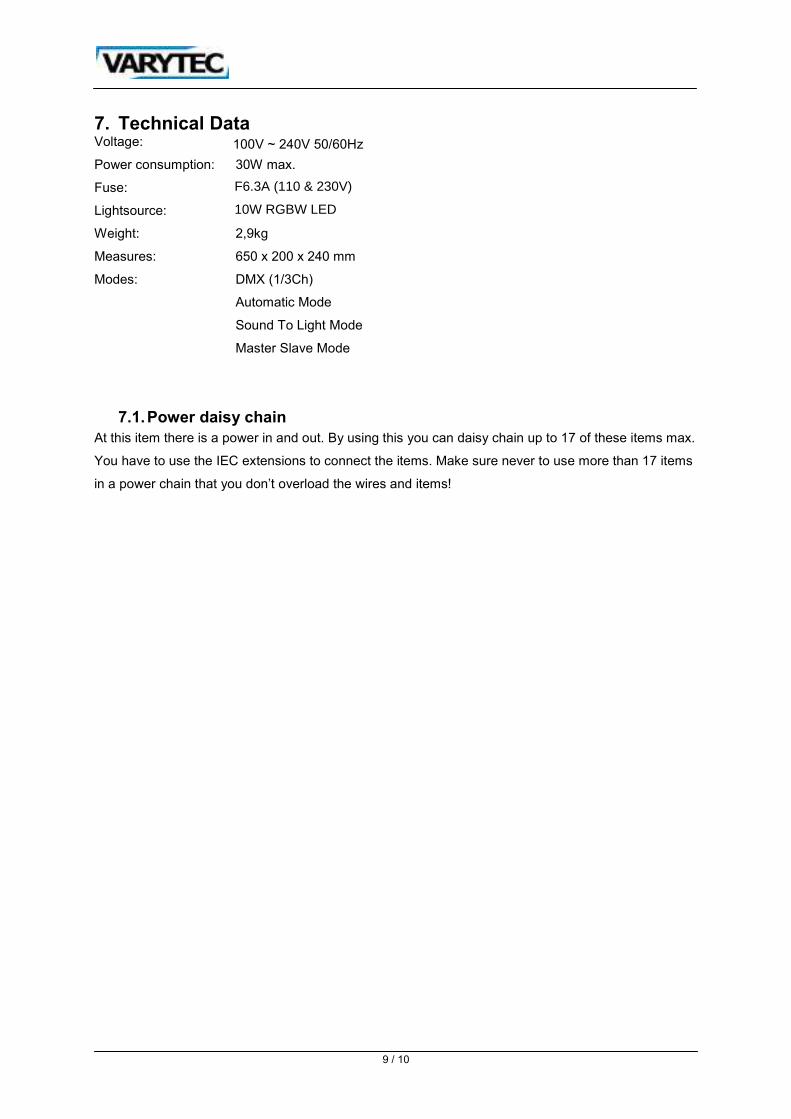
7. Technical Data Voltage: 100V ~ 240V 50/60Hz Power consumption: 30W max.
Fuse:
Lightsource:
Weight: 2,9kg
Measures: 650 x 200 x 240 mm
Modes: DMX (1/3Ch)
Automatic Mode
Sound To Light Mode
Master Slave Mode
7.1. Power daisy chain At this item there is a power in and out. By using this you can daisy chain up to 17 of these items max.
You have to use the IEC extensions to connect the items. Make sure never to use more than 17 items
in a power chain that you don’t overload the wires and items!
F6.3A (110 & 230V)
10W RGBW LED
10 / 10
Importer:
B & K Braun GmbH
Industriestraße 1
D-76307 Karlsbad
www.bkbraun.com